
Here’s a complete list of all you need to get started with your rabbitry and your meat rabbit setup. We’ve laid out all you need to get ready to bring your rabbits home.
Jump to:
- Just add rabbits!
- Cages
- Cage construction
- Cage size
- How many rabbits per cage?
- Feed and Water Vessels
- My recommendation for feed and water dishes
- Rest Mats (optional but highly recommended)
- Hay Rack (optional)
- Buying vs Building Rabbit Cages
- Options for Housing Rabbit Cages
- Do’s and Don’ts
- Where to Find Plans for Homemade Cages and Rabbit Housing
- Rabbit Cage and Equipment Quick List
- Adding On as Your Rabbitry Grows
Just add rabbits!

One of the first things you need to organize when starting out with meat rabbits is the housing. There are several options for backyard meat rabbit growers. Some of these are well suited for outdoor growers, while others are better for indoor use in a barn or shed.
The most popular, most affordable, and most available are simple cage setups. Cages can be used indoors or out with the right support and coverage. They’re also the most recommended for housing meat rabbits, so that’s what’s on our list for a starter meat rabbit equipment setup.
Here’s what you need to get before you bring your meat rabbits home.
Cages

The fastest way to set up your rabbitry and arguably the best way to raise meat rabbits is in cages. That is what we cover in this article, as it is our top recommendation for keeping meat rabbits happily, humanely, healthfully, and safely.
Cage construction

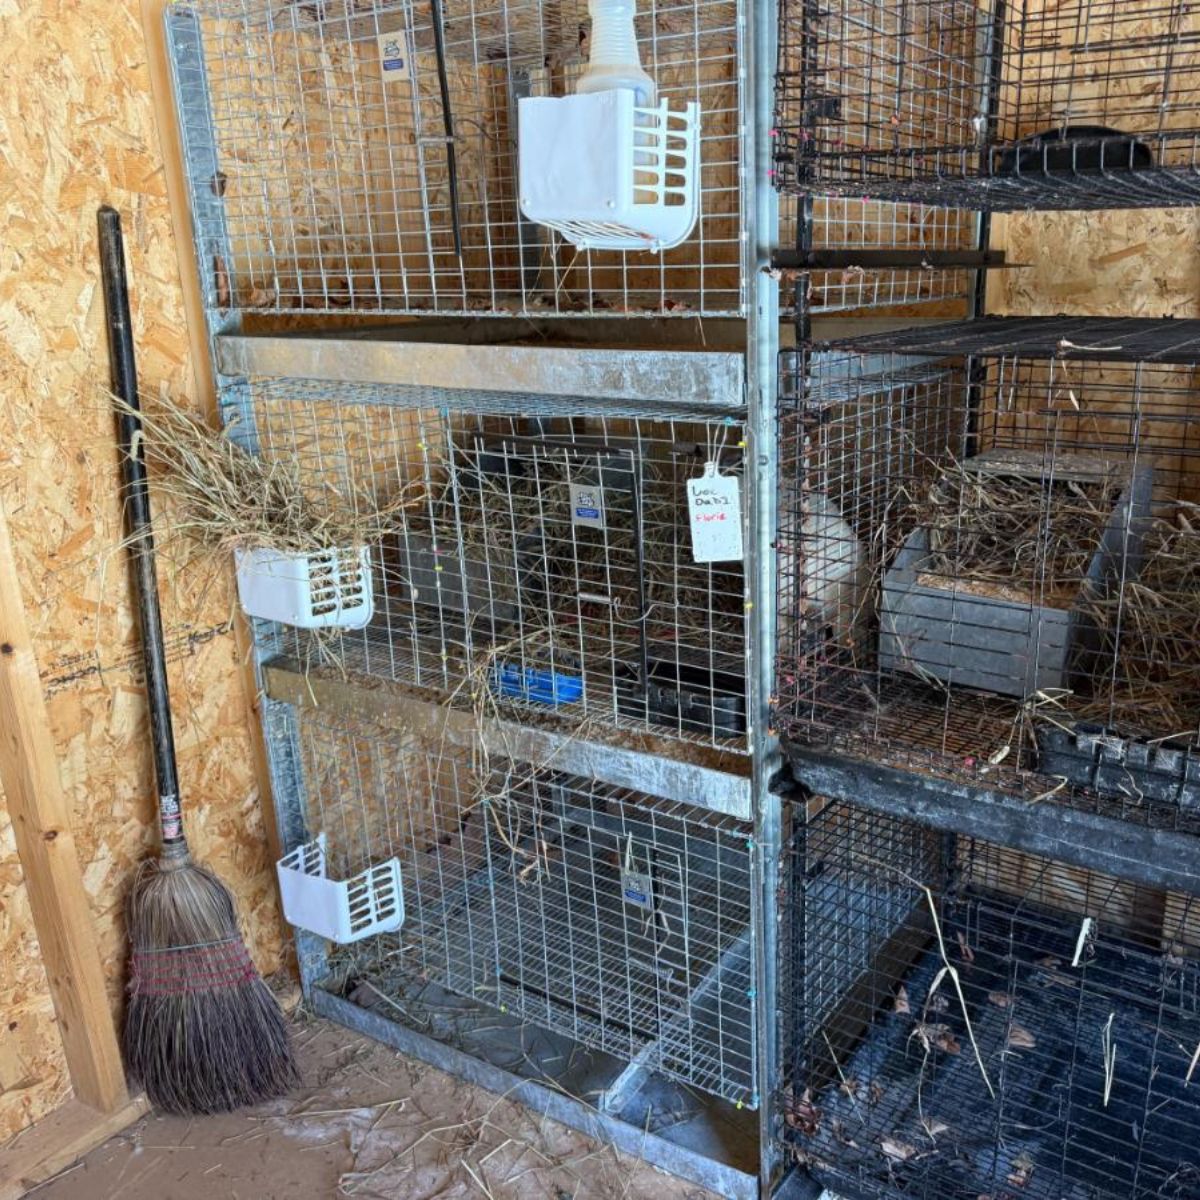
The best material for cages is wire. All wire. Ideally, the cages will be set or stacked on wire or metal frames, too, though a wooden or PVC pipe frame is also acceptable. Wire cages can also be hung from chains from the ceiling of a sturdy shed or barn.
All wire and metal construction is preferable because it is long-lasting and cleanable. Cages can be power washed, sprayed with disinfectant, and scraped or brushed with sturdy metal or wire brushes/scrapers. Some keepers even take their cages outside and run a torch over them to get rid of stubborn hair or to disinfect them with fire and high heat (of course, you need to take proper precautions when doing this).
Do not build cage frames for the cages themselves out of wood. Wood will be chewed, which will shorten the life span of your cages and will compromise their safety and integrity. It also houses pathogens, soaks with urine and moisture, and is not able to be disinfected. Wood frames can cause splinters in rabbits, too, which is an invitation for infection.
Cage wire should be galvanized or coated to prevent rusting so you get a long life out of your cages.
The design of your cages should be such that the openings in the wire are small enough to keep any rabbit inside that cage that will be housed in it. This is not hard for older grow outs and adult rabbits, but it is something you need to keep in mind for breeder’s cages that will have tiny wriggling kits in them.
For the sides and tops of meat rabbit cages, a standard wire/opening size is one by two inches. For the floor, the correct size is one-half inch by one inch. The wire should be woven or welded wire, not hardware cloth—hardware cloth is too hard on the rabbits’ feet and degrades too quickly.
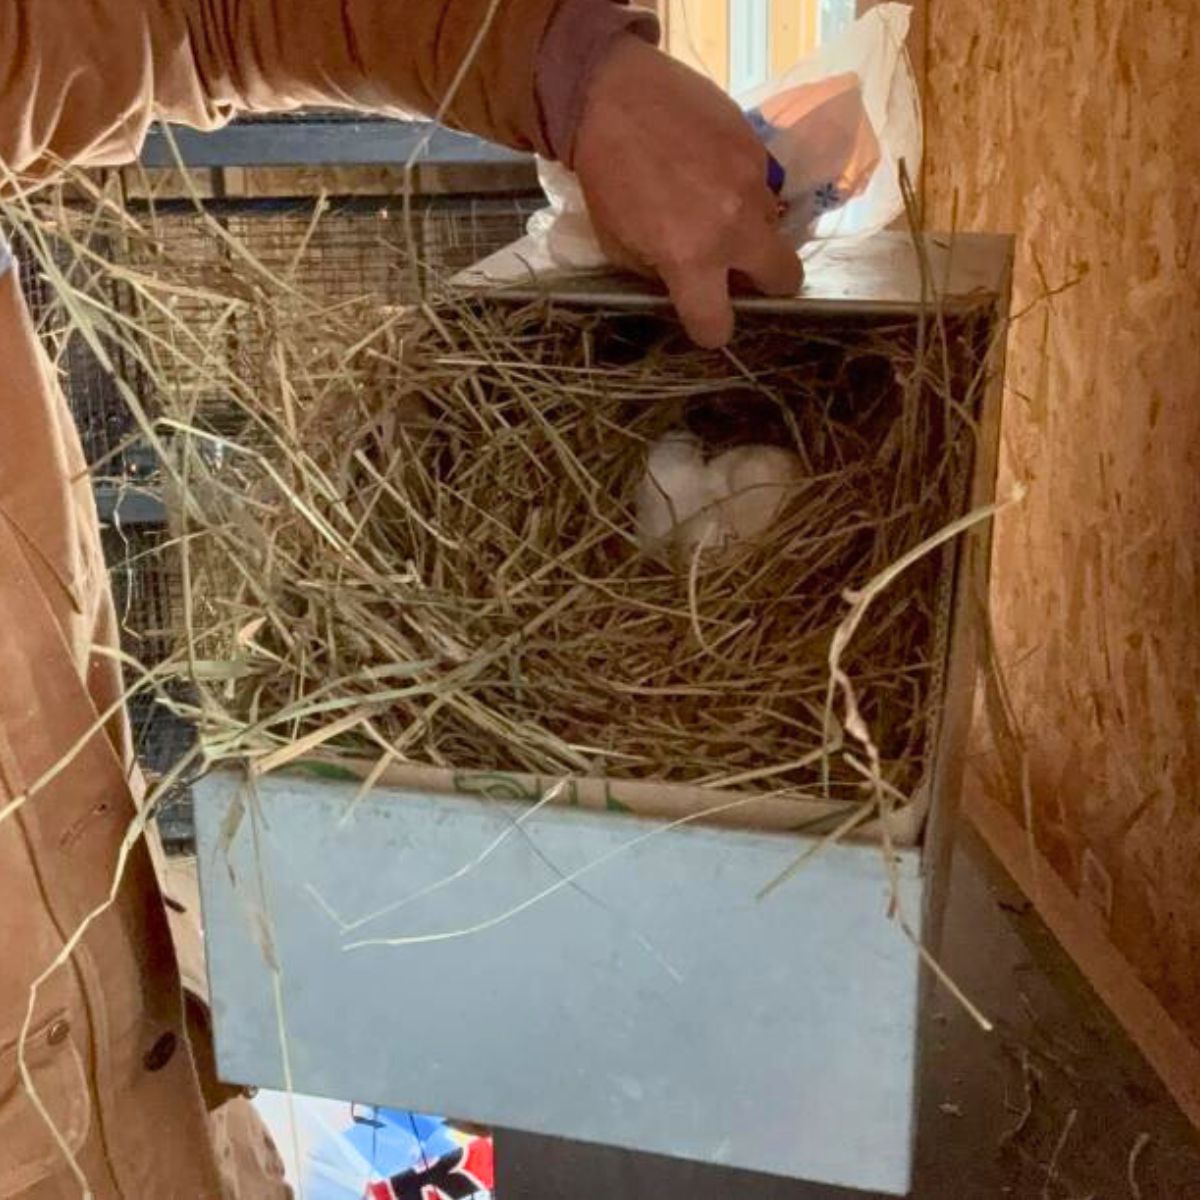
Make sure the door opening is large enough to get large 6 to 9+ pound rabbits in and out easily. It should be large enough for you to reach in and reach the rabbits. Doors also need to be large enough to easily move nest boxes in and out for breeding does. The standard nest box size is 10 by 18 inches.
Cages that will house litters of kits can also be fitted with “baby saver” wire that fits inside along the bottom two inches to prevent loose kits from wriggling through the wire openings. If your cage has a solid shield (like a urine guard) or sold metal bottom area, you may not need the baby saver wire.
Indeed, an all-wire cage is the simplest and most hygienic way to go with meat rabbits.
Cage size

Meat rabbits are large, heavy rabbits, so they need adequate space. Rabbits need minimum square footage and the ability to move around the cage to keep their guts functioning healthfully.
The right size cage is a little different depending on the rabbit and what it will be used for. Though there is some variation and there are differing opinions on the matter, these are the cage sizes we suggest for the different rabbits you will be keeping:
- Breeding does: 30 by 30 inch or 30 by 36-inch cage (30 by 36-inch preferred)
- Breeding bucks: 30 by 30 inch
- Grow outs: 24 by 24-inch cage
All cages should be 16 to 18 or 24 inches tall.
Breeding does get the largest cages because they need flexible space for when they have kits. Their cages need to be large enough and comfortable enough for them to live their whole lives and also large enough to fit nest boxes in and out when needed. Further, does need extra space for young kits to run around from about the age of two to six weeks, when they become mobile and before they are weaned.
If you’re looking for one solid recommendation for square footage for meat rabbits for breeders, a good number is six square feet of floor space. But equally important is to make sure the rabbits have enough room to stretch out and lay down comfortably in the cage.
Bob Bennet, a respected author of the Storey’s Guide to Raising Rabbits, has a good rule of thumb that states that breeding does should be housed in cages with square footage close to their body size (by weight). By this rule, a cage that is 7.5 square feet (30 by 36 inches) will be adequate to house most meat rabbit does and their litters if the litters are weaned by about 6 weeks (which is a typical and perfectly normal age to wean rabbits kits by—they're quite independent and eating and drinking on their own by this age, and most mothers no longer have an interest in nursing them for more than 6 weeks anyway).
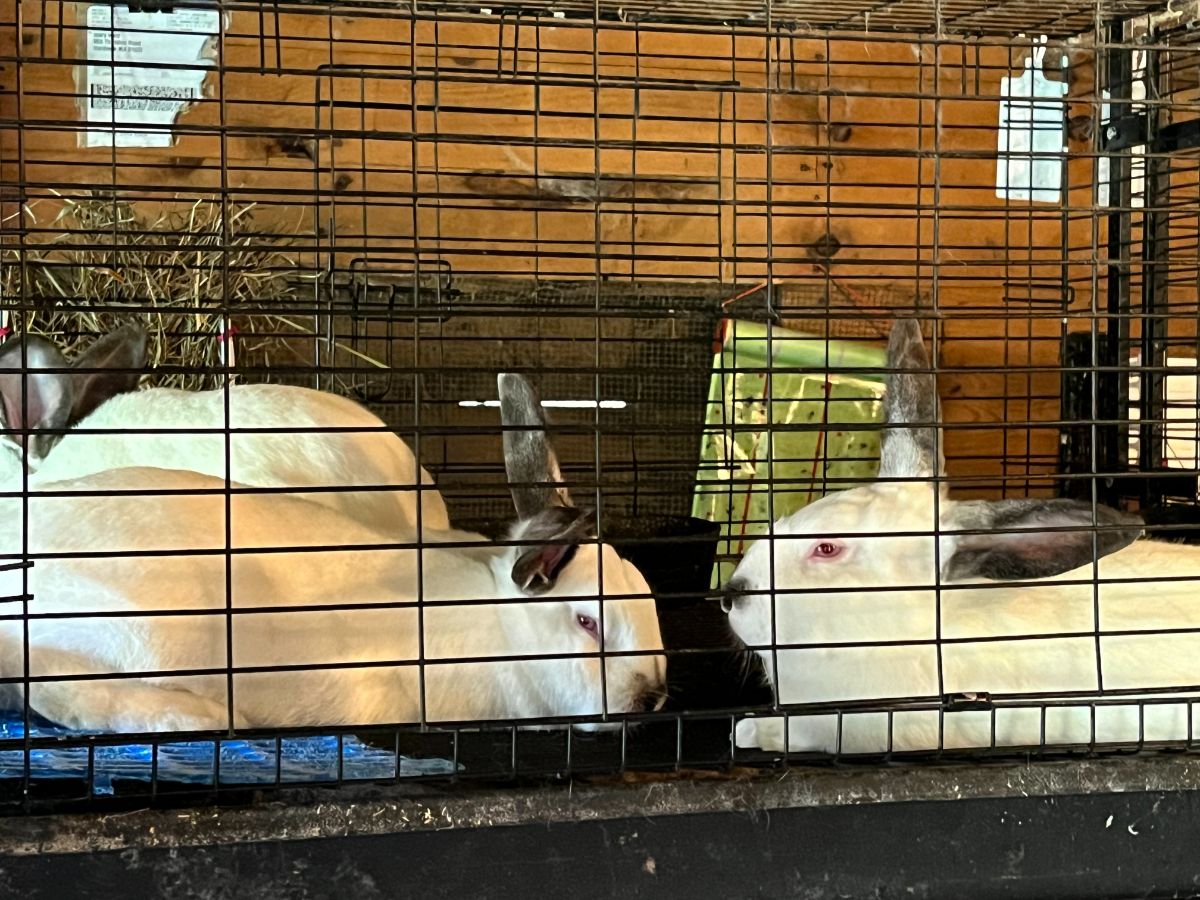
How many rabbits per cage?

If you want one general rule, the rule is one rabbit per cage. Of course, this differs for breeding does with litters. There is flexibility for grow outs, too.
- Breeding bucks should only ever be kept one buck per cage
- Breeding does should also only be kept one doe per cage
- Grow outs have more flexibility depending on your grow out setup. They can be housed individually or doubled in a 24 by 24 cage until harvest. Larger cages can fit more grow outs.
Mature rabbits of breeding age should not be housed together because inevitably unwanted breeding, fighting, and injury to kits will occur. Each adult needs a space that is their own.
For grow outs, plan on about two square feet of space per rabbit until harvest time (10 to 16 weeks). You can house two grow outs in a 24 x 24 cage. Some people keep a single large cage to grow out a whole litter, and the whole litter is moved into that cage. If you do not separate grow outs by sex, you must process them by 12 weeks old!
A better, more hygienic, and more manageable group grow out arrangement is to separate the litter by sex. Females can be housed together and males together. If harvesting at 5 pounds (about 10 to 12 weeks), cages of 30 x 36 inch size would be adequate enough. If you are keeping grow outs to 16 weeks or older, you need to reduce the litter size and split it amongst three or four cages of this size.
Also, consider that the more rabbits there are in a cage, the more competition there is for food and water, and some grow outs may get crowded out of feed. This is an argument for housing grow outs in smaller cages (24 x 24) and in groups of no more than two. It requires more cages, but the result is a better growth rate and more meat. And good cages will last you a long time—many years. (This is my personal setup and preference for grow outs, one or two per 24 x 24 inch cage and harvest at 16 weeks.)
Feed and Water Vessels

The next critical pieces of equipment are feed and water containers. There are a few choices.
“J” style feeders—those that attach to the outside of the cage with a hole cut into the cage for the feeder to slot into—are commonly used. They have the advantage of being able to be filled from the outside and holding a lot of feed for free-feeding (which can be good and bad in itself if your breeders overeat and gain too much weight).
You can have issues with moisture caking and ruining feed that sits too long in these feeders. Some rabbits get bored and like to dig out the feed, too, spreading and spilling it into the cage’s waste system. This ends up being a big waste of feed and money.
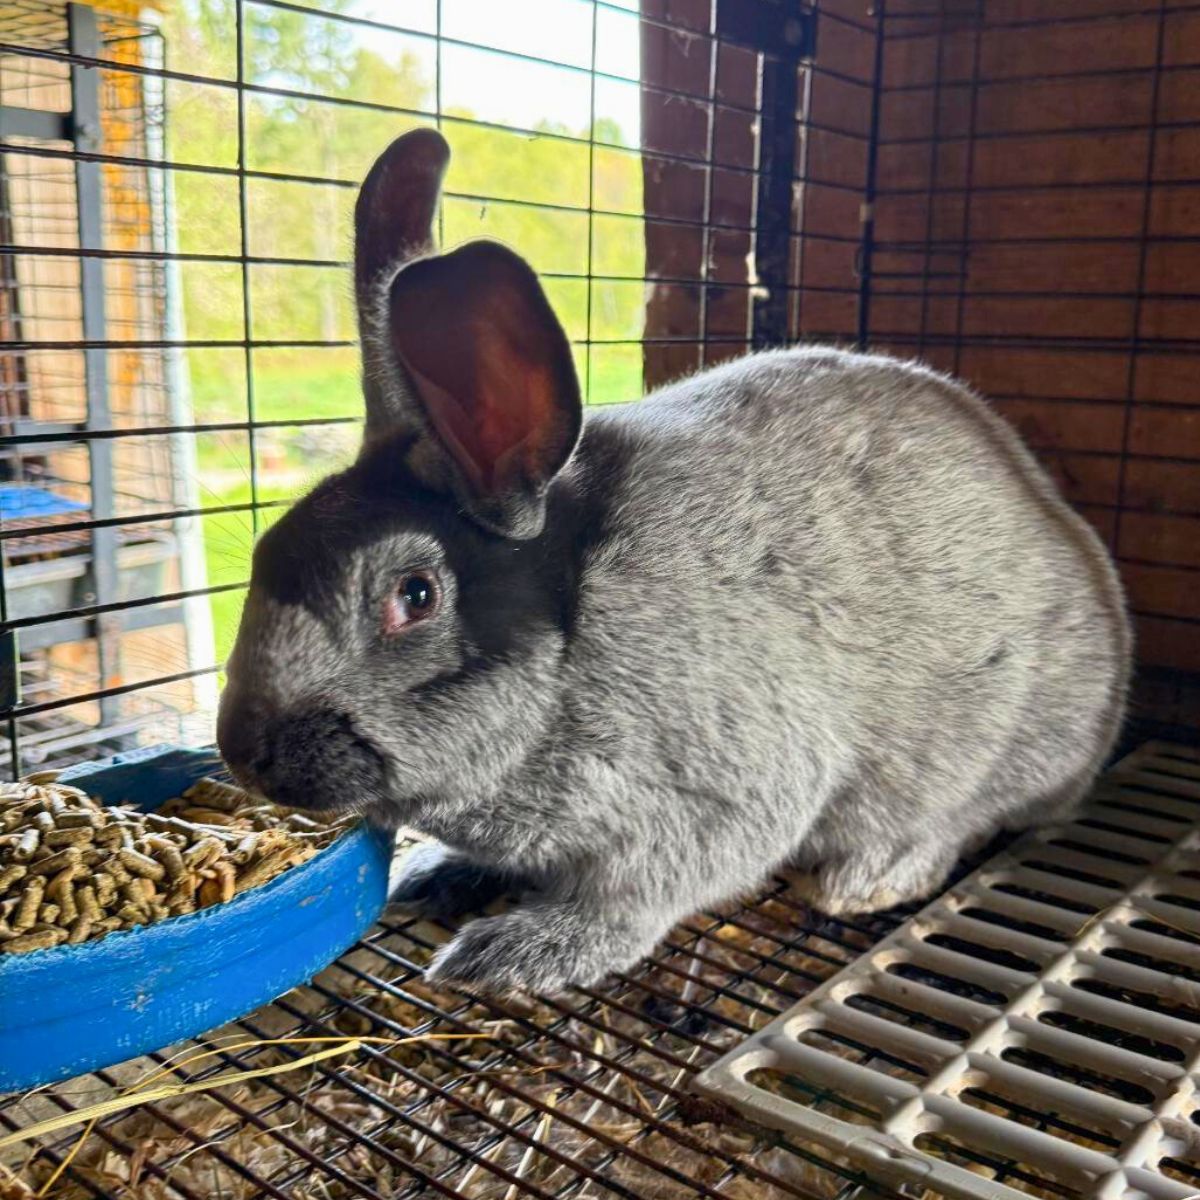
Crocks, cage cups, and bowls are also good options. These fit inside the cage. Some are fixed into a base that can’t move or be dumped or pushed around (these work well but are more expensive). If you are using a cup or bowl style of feed dish, make it one that hooks or attaches to the wire to reduce spillage and tossing around the cage.
Dishes have the advantage of being able to be cleaned and removed easily. Dishes that are the size of your preferred feed portion make it easy to not overfeed your animals. You do want to make sure the dishes are not too small for large rabbits to fit their mouths in and that they at least hold eight ounces of feed, which is enough for meat-sized rabbits for daily feeding.
Dishes and crocks are also good for watering. You will want a larger size for water than for feed, at least 16 ounces (20 is better—better too much water than too little).
Dishes and crocks are fast to feed and water into—just a quick dump into the dish, and you’re good to go.
The other choice for watering is water bottles. These are good options, but they take longer to empty and fill when feeding. Some rabbits (and this has been my experience) also seem to drink better and drink more from a dish. Bottles can also leak.
Water bottles are problems in the winter. The small tubes and nipples freeze faster than the full bottles, so the rabbits have limited time to drink. Dishes freeze, too, of course, but usually stay open for longer (more volume to freeze freezes slower). Rabbits can and will lick frozen ice. This may not be ideal and isn’t the goal, but it’s better than no access to water at all in between waterings.
Open water dishes can also be filled part way and then topped easily with warm water to melt. Plastic dishes with some flex can be warmed enough in a bucket of water to pop out frozen chunks and then refilled. This is much faster than thawing water bottles. In the winter, the most workable way with bottles is to have two sets so you can always be thawing or have one thawed inside to switch out with the frozen bottle, but then that requires you to keep two bottles for every cage—double the equipment and cost!
A third option for water is a piped watering system with nipple drinkers, but that is a more involved and invested setup that may be a future goal, not necessarily one that you’d want to get yourself into when you’re just starting out. (But these setups are also, of course, subject to freezing and wintertime issues). Nipple systems would not fit the definition of a “basic” startup setup.
My recommendation for feed and water dishes

So, then, what are my personal recommendations?
Dishes that hook on the sides of the cages. Good quality, but don’t overspend.
Use an 8 or 10-ounce dish for pellets and a 16 or 20-ounce dish for water. This is what I have personally found to work the best and results in the least wasted feed, thus the best cost protection.
Rest Mats (optional but highly recommended)

Rest mats give meat rabbits a place to get off the wire cage bottom and sit comfortably. More importantly, they keep their hind legs and hocks off the wire when they’re not moving around, which gives them a break, softens the weight and pressure on the hocks, and prevents sores and sore hocks. They’re well worth their weight and moderate cost in rabbit health and comfort.
You can make your own rest mats from various materials. Many people just use a piece of wood plank or plywood cut to about 10 by 18 inches. These tend to slide around a lot, and some messier rabbits will urinate and defecate on them, making a mess. Many like to chew on them, too, which isn’t the end of the world, but rabbits tend to chew wood more than plastic, and they need more frequent replacing. Mostly, though, with wood, it’s the chewing issue.
Some other things people use are cut-up rubber stall mats or tiles (which keep rabbits cooler in summer), but these solid rests can also hold manure and urine.
A better option is the plastic rest mats that are designed to work in wire rabbit cages. They have an open design that lets waste through and doesn’t result in the caking and blocking of waste in the cage. They also have small clips that keep them in place. Place them away from your rabbits’ waste area and over the mats, and the cage will stay clean.
Meat rabbits are heavy animals with a lot of weight and pressure on their back legs. For their health, a rest mat is very much a highly recommended piece of equipment.
Hay Rack (optional)

You may or may not choose to feed hay. If you do feed hay, a hay rack is recommended.
Hay racks keep the hay off the cage floor, so it doesn’t block waste disposal and keeps the floor clean. The best choice is a hay rack that hangs on the outside of the cage so the hay and any seed stay out of the cage and out of waste that you might be spreading in a garden, etc.
There are some nice hay racks that you can buy, and this may be the way to go if you are only putting together a few cage setups, but you can also make these very cheaply just by hanging plastic storage baskets or cheap wild bird suet feeders outside the wire on the cage. Use zip ties (cable ties) to attach them and let the rabbits pull the hay through the cage wire openings.
Buying vs Building Rabbit Cages

If you’re handy, building your own wire cages is a good option. This has always been the most cost-effective way to go. And truthfully, building wire rabbit cages doesn’t require advanced carpentry skills. It’s a matter of cutting sides and bottoms and using cage pliers and clips to connect them.
Bob Bennett (of earlier Storey’s Guide fame) does now warn people to do their math before they plan to build, though. The cost of wire may be such that it can be cheaper to buy cages from manufacturers, pre-made (because manufacturers can buy wire much cheaper and in bulk).
Either way is a good way to go, but before you decide to build, you might just want to price out the cages that you need. And account for your time and aggravation, too.
One thing to note is this—even if you buy cages, they often come collapsed and “folded”. They’re easy to pop open and secure to finish, but you may need to do a little assembly either way.
There are plenty of cage plans available online (and in a pinch, you could probably figure it out by looking at commercial cages and finding the dimensions). Bob Bennett also offers wire cage plans in his book, linked above, with complete instructions. Bob calls wire cages “wire rabbit hutches.”
Options for Housing Rabbit Cages

In addition to having cages, you need somewhere to house them. Or at least something to house them on. This does not have to be a full barn. It can be a shed, a lean to, or a rabbit house (a framed structure that has a roof and often a back or sides to act as a windbreak that several cages slide into with cages raised up off the ground). It can be as simple as a framework for cages to sit upon with a covering of plywood or roofing to keep the rain out.
Everyone’s housing and setups are different. A lot of people work with what they have, be it a structure or something they adapt. You’ll find more ideas and links to some designs below.
Do’s and Don’ts

Here are a few do’s and don’ts for when you’re getting set up with your rabbit cages and equipment:
- Do think about housing and cage setups early on
- Do get your cages and set them up before you bring rabbits home
- Don’t “wing it” on cages and housing! Have a plan and be ready.
- Don't fall into the trap of going overboard on pet-style cages or play setups
- Do keep it simple. You want to form and function with reasonable comfort accommodations
- Do choose cages and housing or framework that is cleanable
- Don’t build from materials that will be chewed and compromised by your rabbits
- Do raise and/or protect cages so your rabbits are safe from predators and pets—including your own and neighborhood cats and dogs!!
- Do choose cages that give you a good line of sight to your rabbits so you can observe them daily—and they can observe you!
- Do consider how you’ll handle the waste—this decides how your cages will be housed and organized
- Don’t feel guilty about caging meat rabbits. They are production animals and hands down, raised, protected cages are a healthier and safer way to keep rabbits.
- Do allow yourself to modify your equipment and setup and find what works for you, but
- Don’t waste too much time and money changing things all the time. Build; don’t rebuild.
Where to Find Plans for Homemade Cages and Rabbit Housing

Here are some links to some indoor and outdoor meat rabbit cages, hutches, and rabbit house setups:
- https://extension.msstate.edu/sites/default/files/publications/building-construction-plans/6277.pdf
- https://extension.msstate.edu/sites/default/files/topic-files/small-animal/rab-6360b.pdf
- http://extension.msstate.edu/sites/default/files/publications/building-construction-plans/6340.pdf
- https://www.instructables.com/Building-a-Sectional-Rabbit-Hutch/
Rabbit Cage and Equipment Quick List

Here’s a compiled list of what you should buy to set up for a breeding trio of rabbits before they come home. If you are doing just a pair, buy one less doe cage, rest mat, and dish set.
Basic list for a trio setup, breeders only:
- 1, 30x30 buck cage
- 2, 30x36 doe cages
- 3 cage rest mats
- 3 feed dishes
- 3 water dishes
- Hay racks (optional) or for cheap DIY (need zip ties)
Optional depending on needs and setup:
- Stackable cage frame kit*
- Drop pans for Little Giant Cage stackable system*
- Cage pliers and clips**
- Nest box (needed by 28 days after does are bred)
*Make sure you buy the frame kit and drop pan that matches the size of the cage(s) it is for. Make sure it will work with your brand of cage.
Within 2 months of breeding your first doe:
- Cage or cages for grow outs: 2, 36x30 cages or 4, 24x24 cages***
- Feed dishes: 1, 10-ounce dish for each grow out
- Water dishes (or bottles): 1 per cage (can increase to two per cage if grow outs are doubled)
- Rest mats: 1 or 2 per cage (depending on the number of rabbits and cage size)
If you are raising grow outs in large group cages, keep an eye on them and make sure there are enough feed and water dishes for everyone to easily eat and drink their share. This may mean three or four sets per cage.
Cages for grow outs will need to be built and in place before the kits are 5 to 6 weeks old.
Adding On as Your Rabbitry Grows

The important things to focus on in the beginning are the cages and equipment for your breeding trio (or pair) so you can get them home, housed, and breeding. It’s fine to wait to spend the money on the grow out cages or set up until after you have started with your breeders.
Just don’t wait too long. It’s easy to get comfortable with your happy breeders and content little piles of growing kits. But then, all of a sudden, those kits need a home, and you need to move them out from the mother so she can breed and raise the next set of young. Make a point to be ready with grow out cages when your grow outs are ready to move out. You have five to six weeks (maximum of eight) from the time the kits are born. Be ready.
After you’ve had a few successful litters, you can make decisions about how large (or small) you want to grow your rabbitry and meat-raising project. It’s fun and exciting, but don’t get too far ahead of yourself. Yes, you want cages ready when you need them, but it is also pretty easy to build or get ahold of cages within two weeks or so. Take your time to learn and build as you grow. Don’t overcommit and overspend just to decide that you don’t need a setup that large and you don’t want to keep up with that many rabbits.
Find your own way and enjoy the ride!
Esther
This has been the best, most informative article I’ve found on what I need for setup! Thankyou!!
I love the pull out trays you have for the poop, does tractor supply sell them along with the crates you mentioned, or are they the specific ones you linked? On the link, I only saw ones for 30 by 30.
Also, the stackable cage frame kit, do I need one kit per cage?
Mary Ward
Hi Esther. I'm glad this helped!
I'm a huge fan of the pull out trays. Space saver since I can stack the cages, and makes cleaning simple and efficient (I don't love shoveling!).
Tractor Supply sells these cages two ways. They sell the 24x24 in a kit that comes with the stacking frame, J feeder, and water bottles (I don't like J feeders and water bottles so I donate those to 4H kids or rabbit farmers who do like them). That's the cheapest way to buy them, but when I can't find the "kit" I piece it together with separate pieces and it's not much more. I've never seen the larger cages as a kit (30x36 or 30x30).
They also sell all of these pieces separately, so you can choose your system. In other words, you can buy a cage, frame kit, and drop tray all as separate pieces. Which is nice, because I do find over time I end up cracking some trays (usually after a couple years and usually when I'm not paying attention in winter). It's normally the larger trays (36x30) that get cracked because they get heavy and bend more with waste in them. And that usually happens when I have a doe and older kits all together--like weaning age. This is how I buy the setups for the 30x30 and the 36x30.
For the tray link, you might have to search for the specific tray size or select it in a drop down menu if it's there. But they do sell all three sizes of trays.
You do need one frame kit per cage. Even for the top and bottom because you have to have them to fit into the frame above/below. FYI on the frame kit for 30x30 and 30x36 cages -- they're the same frame kit (because the 30 inch width is right for both cages).
I hope that answers all your questions but if not, ask away!
Heather
Good Day, Could you suggest where to purchase cages and pans please? I am looking to get into a rabbity with a buck plus two does. Thank you for your time. Blessings from Alberta
Mary Ward
Hi Heather. I'm not sure who is available or ships to Canada, but the cages you see in my videos come from Tractor Supply Company. They are the DuMor brand. Similar to Pet Lodge brand. I will add that I do reinforce these cages at all the seams, but having done that, they've lasted well , some for over four years now. Mine are inside in a barn.I'm not sure they would be my first choice for outdoors, unless it was a house-type covered setup with limited weathering.
Some other quality cage sellers are KW Cages https://www.kwcages.com/ and Bass Equipment https://bassequipment.com/
Please feel free to ask if you have more questions. Thanks for stopping in!
Amanda
Hi!!
Over in Saskatchewan and I've been looking into meat rabbits as well! Even the 1x.5 wire to make my own cages is hard to find here! There's this place in Ontario. Grandview Rabbitry that will ship cages. Haven't ordered from them personally but have heard good things!
https://grandviewrabbitry.com/shop/
Best of luck!!
Mary Ward
Great thanks for sharing! Good luck!
COLLIN MOODLEY
Thanks for the great advice on keeping rabbits
I would like to know are there any vaccines or meds for meat rabbits
Is there any schedule for meds
Generally like other meat animals and poultry there is meds admistered and regulated
Just want the know how's so we don't get into problems with the authorities as currently in south Africa we faced with all the food poising and expired goods and the government woke up from a deep sleep to enforce rules and regulations almost 30 years later.
Mary Ward
There are no required vaccines that I am aware of. There may be some available to you, but this would also vary by country and location. Perhaps if someone else from South Africa is on here, they could offer some information.
I live in the U.S. and there are some vaccines available, but as meat rabbits live such a short life I don't give them. I try to avoid medications and use more natural treatments, because the withdrawal period before you should use the meat isn't likely to be long enough before you would want to harvest. Medications would only be given when needed anyway.
We do have an article on here about what I keep in my rabbit first aid kit for minor issues and treatments. That would probably helpful to you.
Check out the articles in this category for more: https://meatrabbits.org/category/health/
This is the link to the first aid kit article: https://meatrabbits.org/things-to-keep-in-your-meat-rabbit-first-aid-kit/
You are smart to look to rabbits to make you more self sufficient! Good luck!
Nancy Tuuk
Where do you get your black rubber bowls that attach to the cage?
Great article. Very helpful.
Nancy
Mary Ward
They are a plastic cage cup. I have a local feed store that carries them, but I think they are made by Pet Lodge. There are a lot of online sources of these and similar cage cups. All Things Bunny is a good place to check out. So are the cage companies like KW Cages and Bass. Amazon does have these black cage cups here: https://amzn.to/43sU48w